Hi everyone, I’m going to show you how to create this view in SwiftUI.
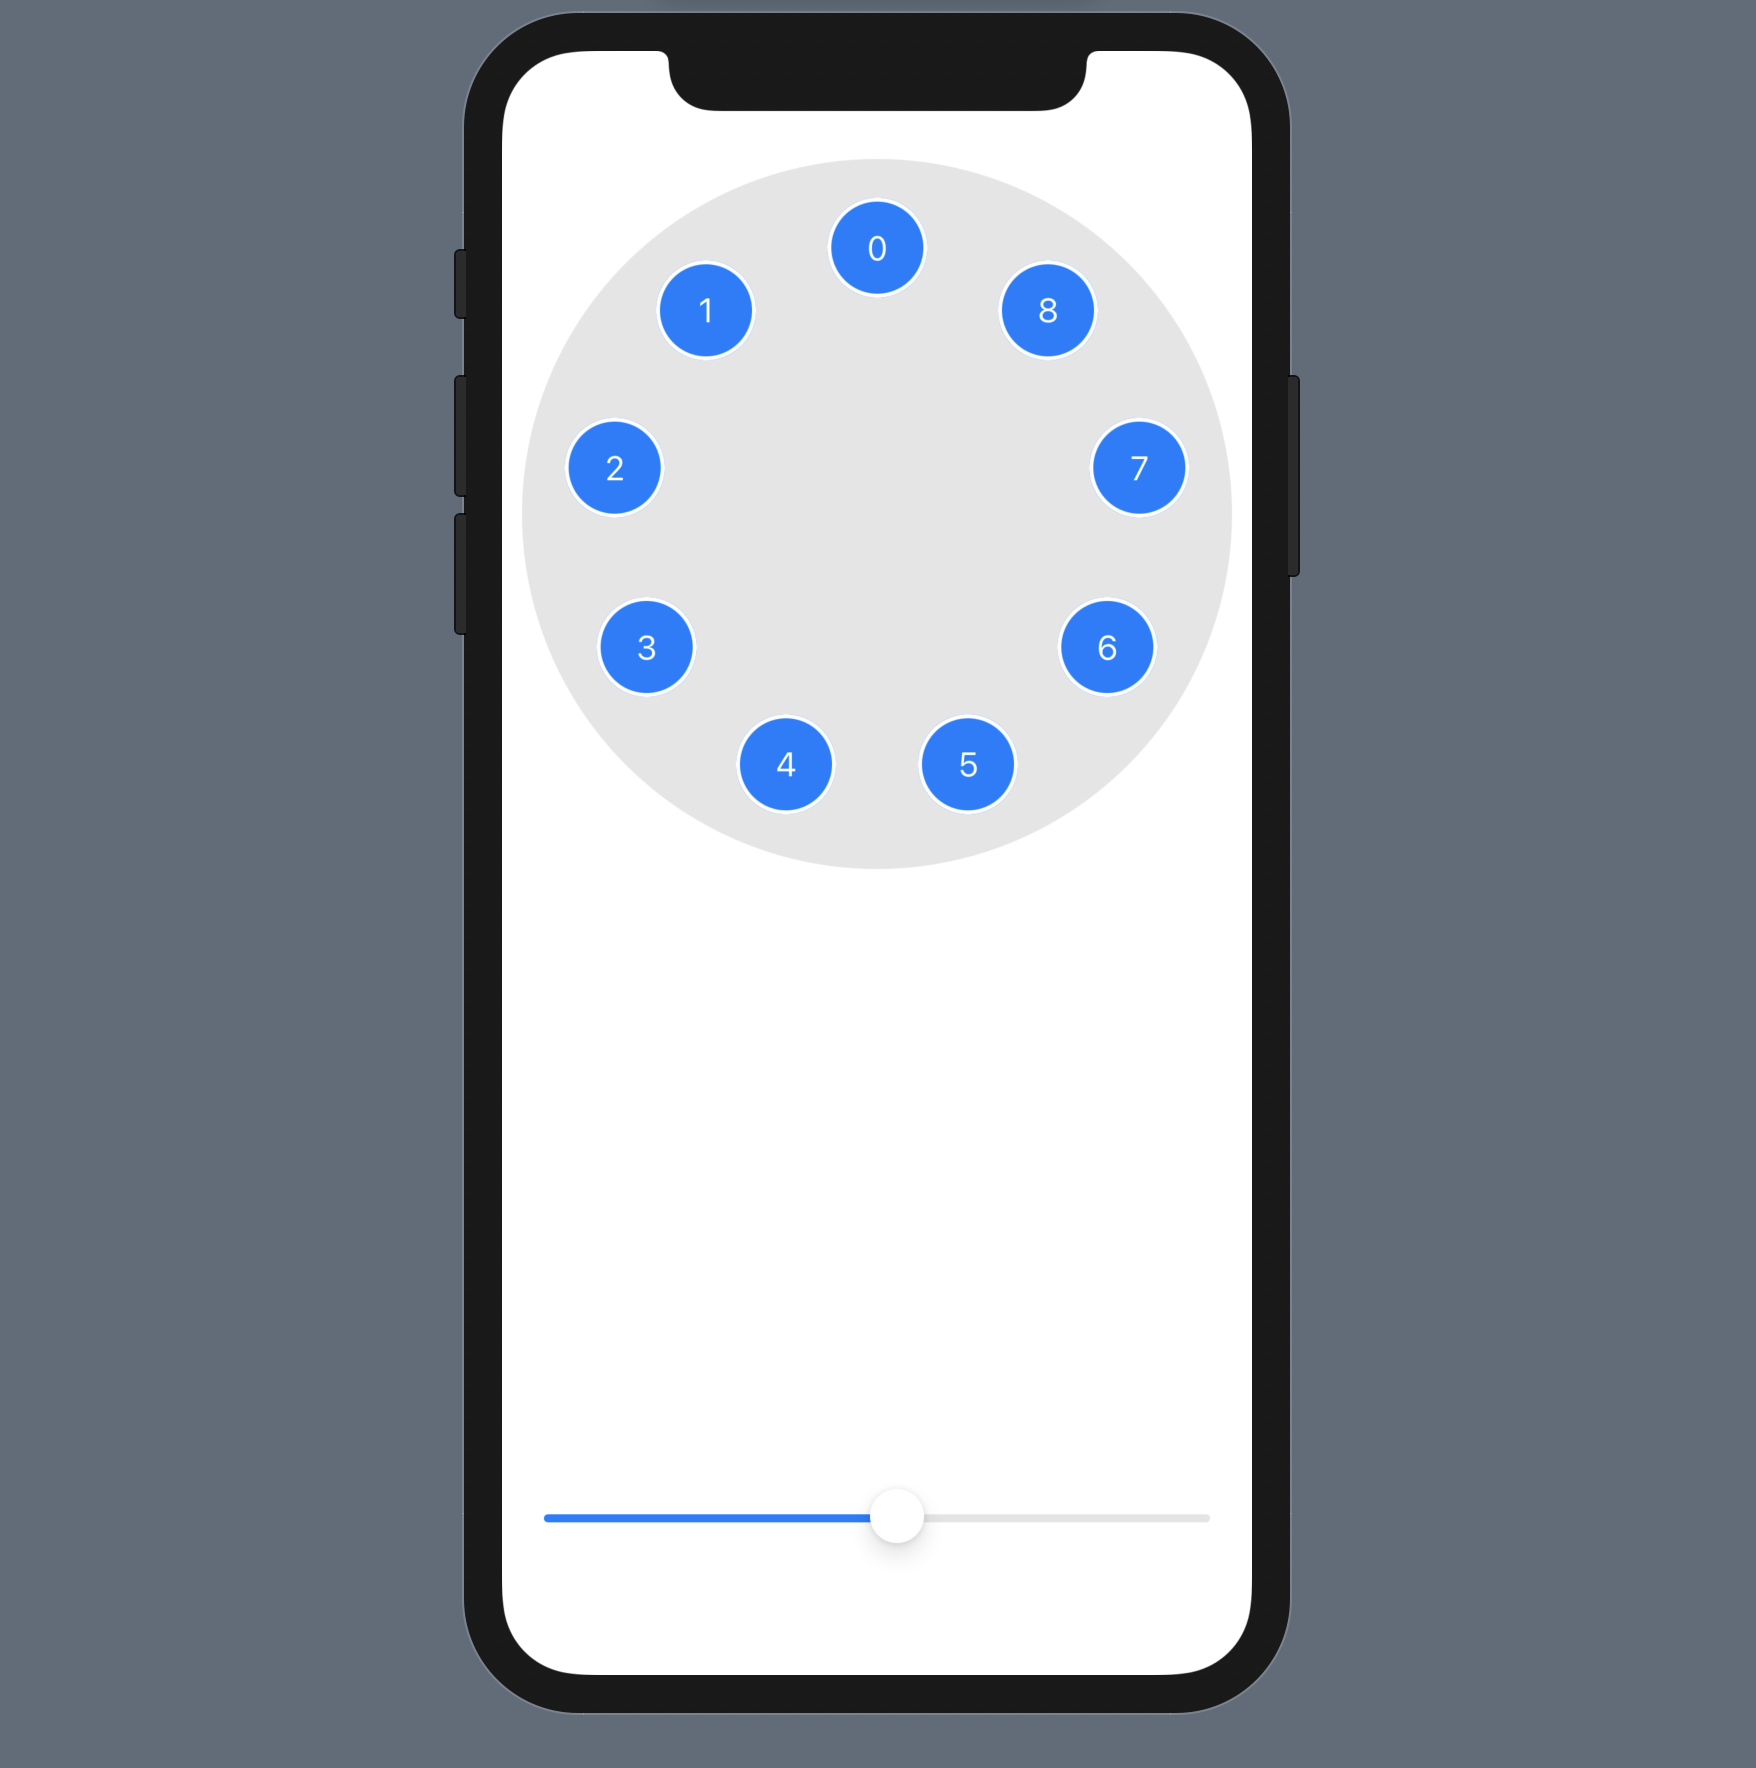 We are going to focus on the layout of the mini circles.
Before we dive in, I recommend you grab the base code for this example from this gist below.
First let’s setup a GeometryReader in our base view to get the width of our
view and set the dimensions of our background circle. We will need this metric
later on when we are positioning our subviews.
GeometryReader { geometry in
  Circle()
  .foregroundColor(.init(hue: 0, saturation: 0.0, brightness: 0.9))
  .frame(width: geometry.size.width, height: geometry.size.width, alignment:
  .center)
  .overlay(
    CircularLayout(
      radius: (geometry.size.width * 0.75) / 2,
      count: Int(self.count))
    .offset(x: geometry.size.width * 0.125, y: geometry.size.width * 0.125)
  )
}
Next we will create our CirclularLayout with radius and count properties.
The count is just for this simple demo and is the number of subviews to
create.
struct CircularLayout : View {
    var radius: CGFloat;
    var count: Int;

    var body: some View {
    }
}
Let’s add a ZStack to our CicularLayout to prevent other auto layout metrics
from conflicting with the positions of our subviews.
struct CircularLayout : View {
    var radius: CGFloat;
    var count: Int;

    var body: some View {
      ZStack {
      }
    }
}
Now we’ll add a ForEach to dynamically generate count number of views inside
our ZStack.
struct CircularLayout : View {
    var radius: CGFloat;
    var count: Int;

    var body: some View {
      ZStack {
        ForEach((0...self.count-1), id: \.self) { index in
          MiniCircle(title: "\(index)")
      }
    }
}
Before we start positioning the subviews, here’s a quick refresher on how the angle relates to the coordinates of a circle.
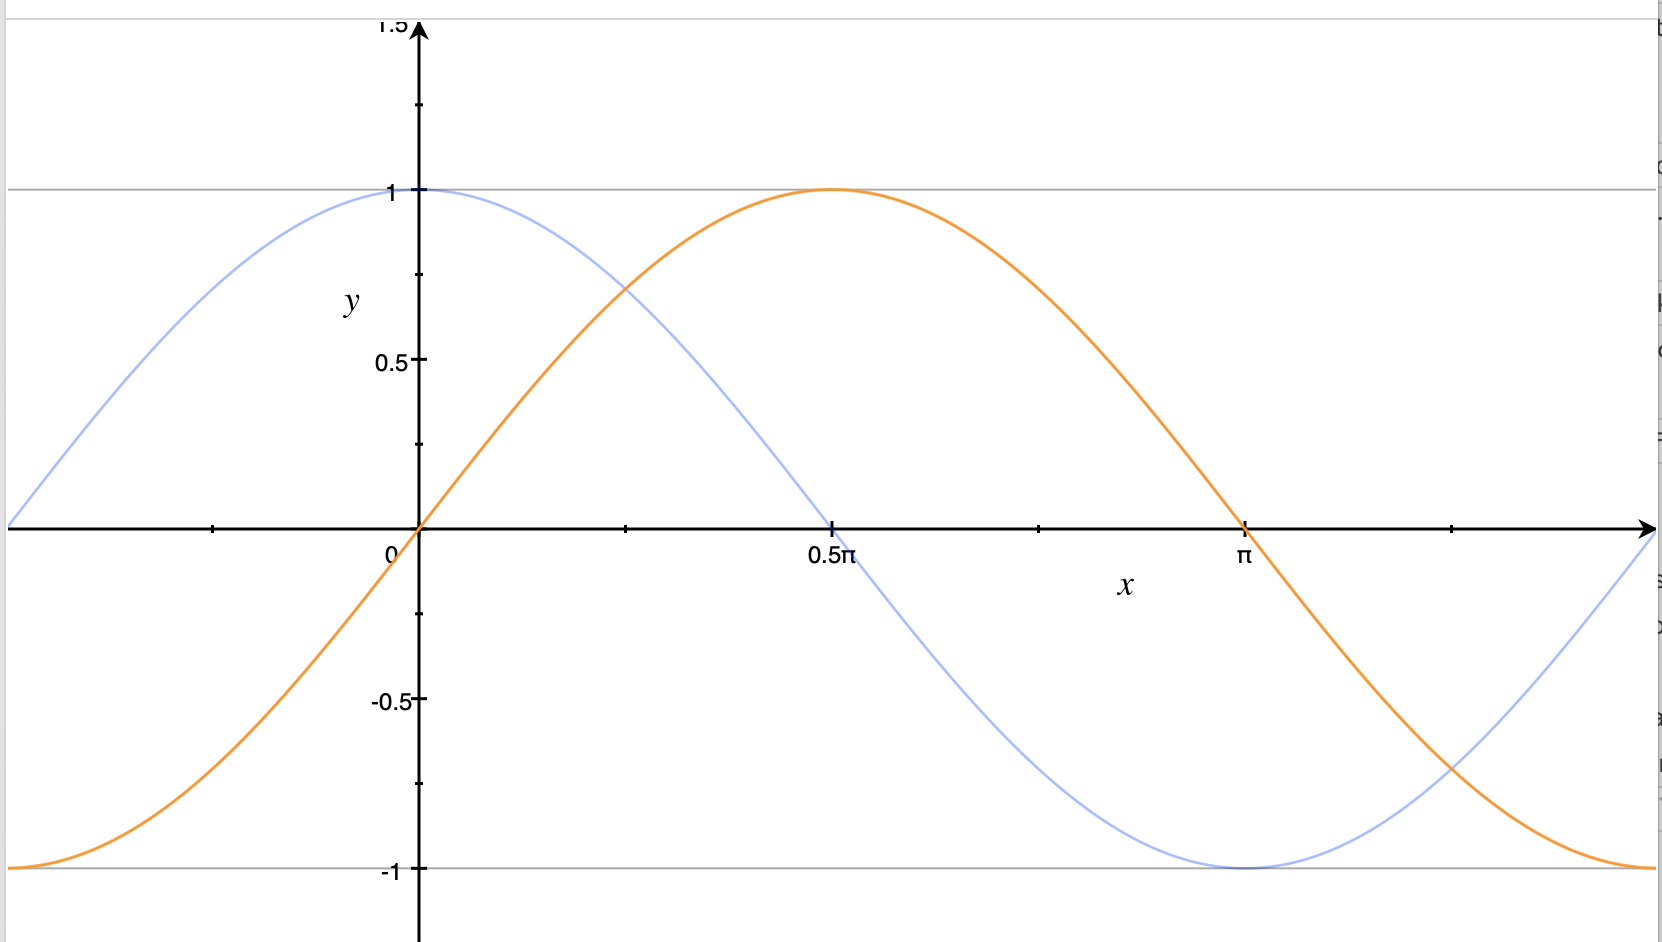
Our X-Axis is radians and our Y-Axis is units.
With our blue cos curve we see that for a 0 radian angle, we have a value
of 1 and at PI we have a value of -1
Similarly, sin is shifted PI/2 radians so it is 0 at 0 and 1 at
PI/2
This lets us use (cos(angle), sin(angle)) as our coordinate for our positioned
subview.
Cool, now let’s get out first view in the correct position.
Start by moving it from (0,0) being top left to being in the center of our
layout (self.radius, self.radius) This lets us just work from the Unit Circle
for easy math.
struct CircularLayout : View {
    var radius: CGFloat;
    var count: Int;

    var body: some View {
      ZStack {
        ForEach((0...self.count-1), id: \.self) { index in
          MiniCircle(title: "\(index)")
            .position(x: self.radius, y: self.radius)
      }
    }
}
Next we will move our subview to the 3 o’clock position to start by adding
cos(angle) * self.radius to the x and sin(angle) * radius to the y.
We’ll workout what this angle is next.
struct CircularLayout : View {
    var radius: CGFloat;
    var count: Int;

    var body: some View {
      ZStack {
        ForEach((0...self.count-1), id: \.self) { index in
          MiniCircle(title: "\(index)")
            .position(x: self.radius + cos(angle) * self.radius,
                      y: self.radius - sin(angle) * self.radius)
      }
    }
}
Remember that’s the form for a coordinate on a circle; adding or subtracting
sindetermines if we go clockwise or counterclockwise). Multiplying by the radius converts the Unit Circle to our circles dimensions.
To determine the angle: we know we want the views to be equidistant. So 2 views
should give us an angle of PI to split the circle into 2. With 3 views we want
2PI/3 since there are 2PI radians in a circle. Here we can see the pattern
is just 2PI/count to get an equidistant angle.
struct CircularLayout : View {
    var radius: CGFloat;
    var count: Int;

    var body: some View {
      let angle = 2.0 / CGFloat(self.count) * .pi
      return ZStack {
        ForEach((0...self.count-1), id: \.self) { index in
          MiniCircle(title: "\(index)")
            .position(x: self.radius + cos(angle) * self.radius,
                      y: self.radius - sin(angle) * self.radius)
      }
    }
}
Lastly we just want to multiply our angle by the index in the loop to apply
a partial rotation around the circle for each subview.
struct CircularLayout : View {
    var radius: CGFloat;
    var count: Int;

    var body: some View {
      let angle = 2.0 / CGFloat(self.count) * .pi
      return ZStack {
        ForEach((0...self.count-1), id: \.self) { index in
          MiniCircle(title: "\(index)")
            .position(x: self.radius + cos(angle * CGFloat(index)) * self.radius,
                      y: self.radius - sin(angle * CGFloat(index)) * self.radius)
      }
    }
}
If you want to adjust where on the circle your first view is positioned, just
add an offset to the cos and sin arguments. For example: cos(angle*index + PI/2) and sin(angle*index + PI/2) will start at 12 o’clock.
And that’s it for how to build a CircularLayout.